PWMAngband source (Tangaria’s game engine) comes with several batch files that actually do the job.
First you need to decide which version of Borland C++ builder you would use. Makefiles are only compatible with Borland (you can use Visual Studio, but you would need your own makefiles). There are two different options:
1) Borland C++ Compiler 7.x (bcc32c)
// won’t work for initial SDL compilation! Use Borland 6 for it (in case if you need, as pre-compiled SDL included in src)
run .bat files in PWMAngband\src\bcc32c
Libraries (WIN client)
Shortcut: all libs archives in one place
- After you’ve installed Borland command line compiler – you must download libraries and compile them.
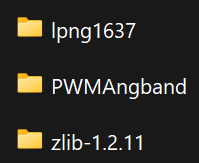
- Download and unzip ZLIB 1.2.11 in the same root directory as your
\PWMAngbandfolder (not inside of PWMAngband folder, but in ../ folder!) - Copy
\PWMAngband\src\bcc32c\Makefile.zlibinto\zlib-1.2.11\win32 - Download and unzip LIBPNG 1.6.37 in the same root directory as your
\PWMAngbandfolder - Copy
\PWMAngband\src\bcc32c\Makefile.libpnginto\lpng1637\scripts - Run
\PWMAngband\src\WIN.bat. This will generate the ZLIB and LIBPNG libraries.
2) Borland C++ Compiler 6 (bcc32)
// works for initial SDL compilation 😉
Attention! BCC 5 / 5.5 doesn’t work! Only 6 version.
run .bat files inside of PWMAngband\src folder
Libraries (WIN client)
- After you’ve installed Borland command line compiler (one of 2 variants above 5.x or 7.x version) – you must download libraries and compile them.
 Download and unzip ZLIB 1.2.11 in the same root directory as your
 \PWMAngbandfolder (not inside of PWMAngband folder, but in ../ folder!)- Download and unzip LIBPNG 1.6.37 in the same root directory as your
\PWMAngbandfolder - In
lpng1637folder – replace thepngwrite.cfile by the one from the\PWMAngband\src\fixfolder to fix a linker error - Edit
makefile.bc32in thelpng1637\scriptsdirectory:ZLIB_DIR=..\zlib-1.2.11
- Run
\PWMAngband\src\WIN.bat. This will generate the ZLIB and LIBPNG libraries.
Libraries (SDL client)
Prerequisite: Build the static libraries libpng.lib and zlib.lib (see previous paragraph).
- Create a
\SDLdirectory in the same root directory as your\PWMAngbandfolder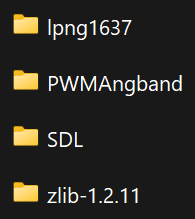
- Download and unzip SDL 1.2.15 in the
\SDLdirectory – so you will have there:
\SDL\SDL-1.2.15 - In
\SDL\SDL-1.2.15\include, replace the following files by the ones from\PWMAngband\src\_SDL:begin_code.h SDL_stdinc.h
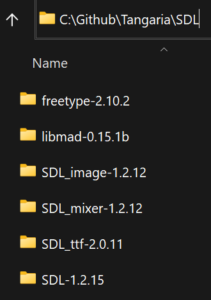 Download and unzip FreeType 2.10.2 in the
 \SDLdirectory- In
\SDL\freetype-2.10.2\include\freetype\config, replace theftconfig.hby the one in\PWMAngband\src\fix - Download and unzip SDL_ttf 2.0.11 in the
\SDLdirectory - Download and unzip SDL_image 1.2.12 in the
\SDLdirectory - Download and unzip MAD 0.15.1b in the
\SDLdirectory - In
\SDL\libmad-0.15.1b, replacelayer3.cby the one in\PWMAngband\src\fixto remove compile errors - Download and unzip SDL_mixer 1.2.12 in the
\SDLdirectory - In
\SDL\SDL_mixer-1.2.12\VisualC\external\include\vorbis\, replacevorbisfile.hby the one in\PWMAngband\src\fix - Run
\PWMAngband\src\SDL.bat. This will generate the SDL, FREETYPE, SDL_TTF, SDL_IMAGE, LIBMAD and SDL_MIXER libraries.

Client
To build client: run the client.bat file in the /src directory. This will generate the mangclient_gcu.exe, mangclient_sdl.exe and mangclient.exe executable files corresponding to the GCU, SDL and WIN client.
Server
To build server: run the server.bat file in the /src directory. This will generate the mangband.exe executable file corresponding to the server.
The clean.bat file will delete all generated binaries in case you want to recompile everything from scratch.
Setup
To build setup (all executables in one folder): run the setup.bat file in the /src directory. This will generate all the files required to run PWMAngband. Setup will appear in \PWMAngband\setup
The cleansetup.bat file will delete all generated files in case you want to regenerate everything from scratch.
Archive (outdated):
Easiest is to download free command-line tools which is a free Borland compiler version 5 and use the makefiles.
After you will download free command-line tools, unpack it to C:\BCC55 and:
1. Add “C:\BCC55\bin” to the Windows OS PATH
2. Create a bcc32.cfg file which will set the compiler options for the Include
and Lib paths (-I and -L switches to compiler) by adding these lines:
-I"C:\BCC55\include"
-L"C:\BCC55\lib"
3. Create an ilink32.cfg file which will set the linker option for the Lib path by
adding this line:
-L"C:\BCC55\lib"